June 30, 2012

We're packing Olive up!

We're packing up and gettin' outta here! Don't worry...we're not going far! 
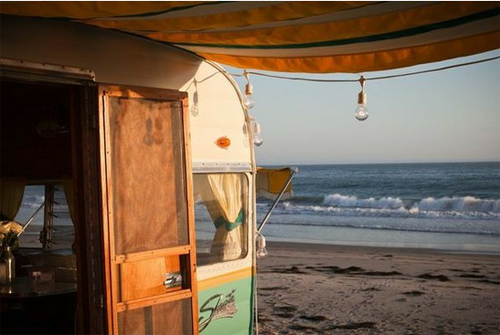
We will be at the Osborne Street Festival today as well as Sunday July 1 for Canada Day with our trailer, Olive! It's our first event of the Summer and we could not be more excited! She's all cleaned up and ready to go! We have been saving tonnes of cute dresses, tops & bottoms as well as lots of fun accessories specifically for our first event so come on down and say hello! 
We will be there from 11am-11pm on Saturday and Sunday, parked across the street from Urban Waves! Hope to see you there!

June 29, 2012

Friday Favorites.

It's time for another random batch of things we've been loving lately...
The most perfect shorts in every way, from Romwe.

The happiest type we ever did see!

We saw this vintage photo from of the Blue Mist Resort Motel over on the Modcloth blog, and are still picking our jaws up off the floor! Go check out the rest of them here!

Love the pastel colors and the peplums by G.V.G.V

This dress is perfection! Available soon at Modcloth.

Also from Modcloth, this insanely cute raccoon purse!! I already have the fox one, but this is even cuter!

Happy Friday friends!

June 28, 2012

She's baaaaaack.

Look who's out of hibernation!
On Sunday we got our trailer pulled into the city from Blumenort where it spent the Winter at my in-laws! You could see her coming down the street, in all of her orange and white glory, from a mile away!

The first thing we did was take absolutely everything out of the trailer and deal with last years' mess. It seemed as though we got a little lazy after our last festival, and there was lots of random debris.

We gave her a really good wipe down seeing as how there was a solid layer of dust & dirt all over her!

We opened up all of the windows to air her out.

We cleaned out the little cubby, and made a list of everything we needed to bring/buy/fix.

Last but not least we loaded her back up after everything was spotless inside! 

We're getting ready to pull her  to our first event of the season-The Osborne Street Fest on June 30 & July 1! We'll be parked in front of Urban Waves from 11-11 both days! Come and visit if you're in the area!

Check out our Facebook page for more info on the festival.

June 27, 2012

Summer fun in the kitchen!

I don't know about you guys but as soon as summer rolls around all I feel like doing is cooking! There is something about the smell of fresh herbs mixed with a warm breeze blowing through my kitchen window that I just find so inspiring! Erin and I both spend quite a bit of time browsing through various food blogs and have both stumbled upon a few recipes that we have book marked and put on our "must make" list for this summer. Here are a few yummy dishes that we can't wait to sink our teeth into (literally):

Fresh mussels are one of my favorite treats and I have made them several times in the past but I would really like to start making them more regularly this summer! This recipe for Mussels Saganaki (mussels with tomato, feta, white wine and peppers) looks absolutely delicious!

This Veggie Burger Recipe looks like one of the most scrumptious I have ever seen! I mean, how can you say no to a patty made of crimini mushrooms and brown rice topped off with goat cheese, green onions and fig aioli? Mmm... I cannot wait to make this recipe!

I am the hugest sucker for cheese, especially brie, so this simple side dish of Baked Brie with Rosemary, Honey and Walnuts has me drooling. (I'm especially a fan of the idea of being able to use my fresh rosemary from my herb garden!)

This looks like the perfect summer appetizer: Peppered Figs with Fresh Mint and Crumbled Goat Cheese. Simply delicious.

When we were in Bali I had the most amazing gorgonzola gnocchi, in fact I liked it so much that later on in the trip we went back to the same restaurant and I ordered it again! Ever since then I have been dying to try to make my own gnocchi from scratch and this recipe for Potato Gnocchi with Gorgonzola looks pretty darn good.

I love quinoa salads, but this Quinoa Salad with Watermelon, Basil and Feta takes it to a whole new level! It just looks so light and refreshing! I can't wait to serve this at my next backyard BBQ.

So... are you hungry yet?
XO, Stef

June 26, 2012

Would you like red or white?

Canada Day is just around the corner so we thought we would get into the patriotic spirit by sharing a few cute red & white photos with you this Hues-day!

Cream for your coffee? Yes please!

This 1960's scooter dress is the bee's knees.

Planning a picnic date in the park? 
This red and white plaid picnic basket set would be perfect for you!


Stripes on stripes? Works for us!

Pair these red and white pumps with your favorite vintage sundress and you're ready to hit the town in style!  XO

June 25, 2012

DIY Retro Wood Wall Art!

Today we are going to share a fun little home decor project with you! It is quite simple but a little bit time consuming so it is the perfect project for a crafty summer evening!

-scissors
- painting tape
 -wood stain in your desired color
-one or two paintbrushes in various sizes
-a few different paints (I just used leftover paint I had from painting my living room)
-clear spray paint to use as a sealant/top coat
-stencils (You can find these at your local craft shop or make your own. For mine, I just found an image on the internet that I liked and adjusted it to the correct size on photoshop, then printed it out on thick paper.) 
-a piece of wood in a fun shape that you can use for your wall plaque (You can find these in various shapes and sizes at your local craft store. I had a very specific idea in mind for mine so I got my wood custom cut into 2 big diamonds from a piece of plywood)

First step - Stain the wood.
I chose a medium brown stain with a bit of a reddish tint to it because it sort of reminded me of an old sixties teak table. When working with stain remember that it dries quickly so always finish the whole piece all at once rather than starting and finishing later.

Second step - Cut out your stencil and tape it down.
While your stain is drying cut out your stencils. Once the stain is dry to the touch you can tape your stencils down in your desired locations. Make sure it is securely taped down because you don't want them to move around when you start brushing paint on.

Third step - Paint.
I used two different stencils overlapped to create this look. First I taped the tall skinny stencil down and painted over it with two coats of orange paint. I let it totally dry before taping the second stencil on because I knew that I wanted them to overlap a bit, and then I gave the second stencil two coats of turquoise paint and let them both dry. It is important to be patient and let the first stencil dry completely before applying the second stencil because you don't want to risk smudging any paint.

Fourth step - Add little touches.
Instead of cutting out such a small stencil for the stem of the apple I decided to just paint the intricate details by hand using a small brush. Painting by hand can be tricky, so just be sure to go slow and take your time. Once you are satisfied with how the paint looks and it has dried, it is time to spray it with a clear coat. This is an optional step, but applying a clear coat not only protects your art piece but it all gives the wood a nice shiny appearance. I am planning on hanging mine outside my house on the wall of my patio so I especially want to make sure that I give the wood a good thorough coating because I want to keep it protected from rain and humidity. You don't need to worry about this as much if you are planning on keeping your art indoors.

Fifth step - Hang it.
There are different options you can use to mount your piece: you could use a picturing hanging kit or you could get a little hook from your hardware store. I decided to take an even easier approach and I just drilled a half inch deep hole in the back. That way if I hammer a nail into the wall it will fit nicely in the shallow hole at the back of the wood. If you decided to use this method then be sure to drill slowly because you don't want to all of a sudden drill too far and have your drill come out the other side! 

Enjoy!
And you're done! Have fun finding the perfect spot for your new custom art work! I love centering mine above my bed or above the turquoise couch in my living room!
XO

June 24, 2012

The King of Kitsch: Vladimir Tretchikoff.

Vladimir Tretchikoff was born in 1913 in Siberia and was a self-taught painter who was very popular in the 1950's and 1960's. After living in Siberia for a few years, Tretchikoff's family moved around to Shanghai, Malyasia and finally South Africa which was where the inspiration came for his paintings. His work consisted mostly of portraits, still life, animals, or exotic flowers, however he was most known for the kitschy portraits he painted of women from the South Pacific. Many art critics did not consider his painting style to be actual art and dubbed him as the "King of Kitsch", but that did not affect his popularity in the least. In fact, the demand for Tretchikoff's paintings sky-rocketed so high in the 60's and 70's that to this day he is thought to be the artist with the most reproduced paintings second to Picasso. 

Here are a few of our favorite Tretchikoff prints: 
(and I am even lucky enough to have two, as seen in the photo above!)
"The Chinese Girl"
(This is possibly the most well known of all of Tretchikoff's work.)

"Fruits of Bali"

"Lady From Orient"

"Miss Wong"

"Balinese Girl"

All images found on www.vladimirtretchikoff.com
except for the first one, which is a photo I snapped of my bedroom wall.

P.S. While we're on the topic of sixties art, stay tuned tomorrow because we will be sharing our wall art D.I.Y. project with you! Hope you all are having a fantastic weekend!

June 23, 2012

Call for July Sponsors & A Winner!

Hello fellow vintage enthusiasts! We would love to promote your blog/shop for the month of July! Our sponsor rates have stayed the same as the previous month, but in case you missed it last time, you can take a closer look at them here. The XL spot is reserved for July & August but is available again for September! July is going to be another pretty exciting month with our first event of the year with our trailer happening on the 1st!

We are super excited that our stats are continuing to grow at a steady pace! We just wanted to say a big thanks to all of our amazing readers! You guys are seriously the best!

Oh So Lovely Vintage's Current Stats: (As of June 23, 2012)

-1749 Google followers
-1805 Bloglovin' followers
-2048 Twitter followers
-2094 Facebook followers
-Almost 80,000 page views last month!

Please contact us at ohsolovelies@gmail.com if this is something that you are interested in!
xo
Erin & Stef

We also have a winner to announce!

June 22, 2012

Things we love about Summer.

Hands down summer is our favorite season of the year, which is probably because 70% of the year we have chilly/cold weather here in Winnipeg so when the snow actually does melt and the rain finally does stop we are ready to just sit back and savor those precious warm and sunny days. Now that summer is officially upon us, we made a little list of a few things that we are most looking forward to:

1. Hosting outdoor wine and cheese parties.

2. Going berry picking and then baking pies from our fresh picked berries.

3. Being able to wear pretty sundresses and not having to worry about layering it with cardigans and tights.

4. Having backyard bbq's with our close friends and family.

5. Going camping and going to the beach... or both at the same time.

6. Drive-in movie dates with plenty of popcorn.

7. Going road trippin'.


What about you, what is your favorite thing about summer?!

Hope you all have lovely weather this weekend!
XO

June 21, 2012

Inspiration: 60's wood wall art.

Later on this week we will be sharing a fun retro wall art D.I.Y., but in preparation for that little project we have been doing a bit of research into the wonderfully kitschy world of sixties wood art.

The following pieces are examples of a line of still life art made by the Illinois Moulding Company back in the sixties. Each plaque has a raised textured accent which was created by melting down bits of plastic to create a sort of "popcorn" effect. We are using the color combinations, shapes, and textures of these pieces as the inspiration for our own art. Keep your eyes peeled in the next few days for our D.I.Y. post, but in the mean time enjoy this dose of kitschy inspiration:
Love the different shapes in this one!


This is probably one of our favorite color combinations!


Love the over-exaggerated graphic shadows in this trio!


What about you, which one is your favorite?

All images found on the lovely blog www.midcenturia.com